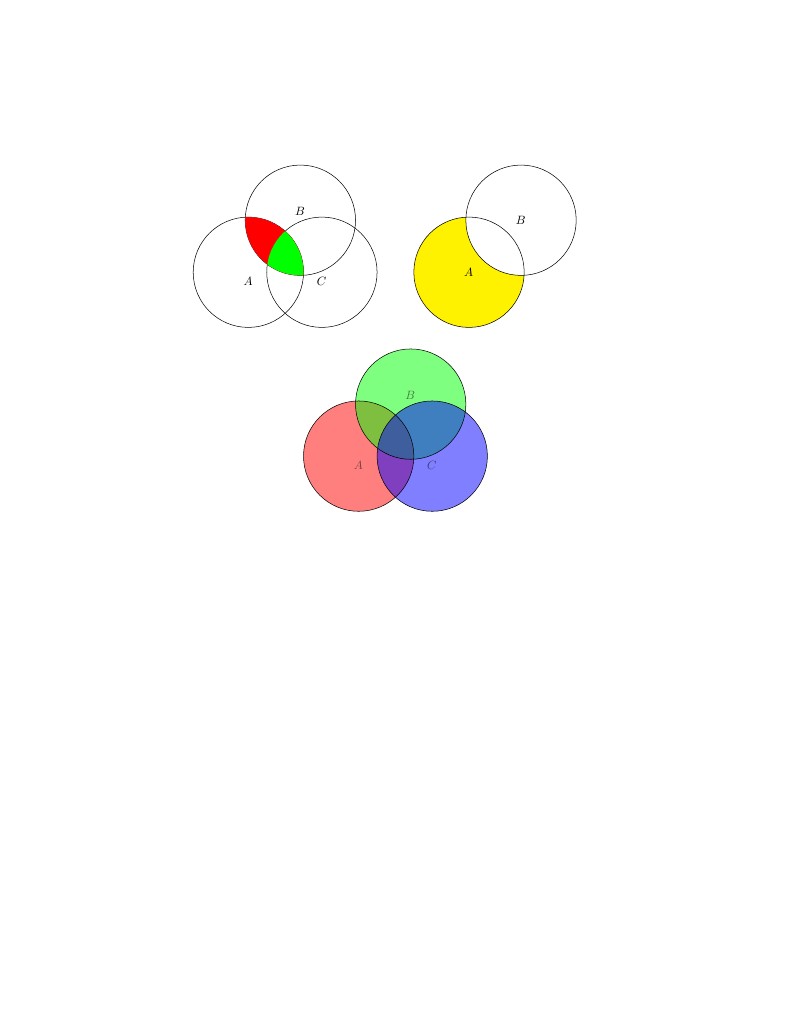
Venn Diagrams in LaTeX
Letzte Aktualisierung:
vor 13 Jahren
Lizenz:
Other (as stated in the work)
Abstrakt:
Venn Diagrams in LaTeX

\begin
Discover why over 25 million people worldwide trust Overleaf with their work.

\begin
Discover why over 25 million people worldwide trust Overleaf with their work.
%%%%%%%%%%%%%%%%%%%%%%%%%%%%%%%%%%%%%%%%%%%%%%%%%%%%%%%%%%%%%%%
%
% Welcome to writeLaTeX
%
% This is a read only version of this example -- to start writing
% use the link in the top right. Thanks!
%
% Example from http://www.texample.net/tikz/examples/venn-diagram/
% \title{Venn Diagrams in LaTeX}
%
%%%%%%%%%%%%%%%%%%%%%%%%%%%%%%%%%%%%%%%%%%%%%%%%%%%%%%%%%%%%%%%
\documentclass{article}

\usepackage{tikz}
\usetikzlibrary{shapes,backgrounds}
\usepackage{verbatim}

\begin{document}
\pagestyle{empty}

\begin{comment}
:Title: Venn diagram
:Tags:  Clipping, Transparency

This example shows how to create Venn diagrams by clipping paths.

| Authors: Till Tantau. Sligtly modified by Kjell Magne Fauske
| Source: `pgf-users`_ mailing list

.. _pgf-users: http://sourceforge.net/mailarchive/forum.php?thread_id=30896803&forum_id=45629

\end{comment}


% Suppose we have three circles or ellipses or whatever. Let us define
% commands for their paths since we will need them repeatedly in the
% following:

\def\firstcircle{(0,0) circle (1.5cm)}
\def\secondcircle{(45:2cm) circle (1.5cm)}
\def\thirdcircle{(0:2cm) circle (1.5cm)}

% Now we can draw the sets:
\begin{tikzpicture}
    \draw \firstcircle node[below] {$A$};
    \draw \secondcircle node [above] {$B$};
    \draw \thirdcircle node [below] {$C$};

    % Now we want to highlight the intersection of the first and the
    % second circle:

    \begin{scope}
      \clip \firstcircle;
      \fill[red] \secondcircle;
    \end{scope}

    % Next, we want the highlight the intersection of all three circles:

    \begin{scope}
      \clip \firstcircle;
      \clip \secondcircle;
      \fill[green] \thirdcircle;
    \end{scope}

    % The intersection trick works pretty well for intersections. If you need
    % the set-theoretic difference between two sets, things are a little more
    % complicated:

    % Suppose we want to highlight the part of the first circle that is not
    % also part of the second circle. For this, we need to clip against the
    % "complement" of the second circle. The trick is to add a large rectangle
    % that encompasses everything and then use the even-odd filling rule
    % (see the manual again):

    \begin{scope}[shift={(6cm,0cm)}]
        \begin{scope}[even odd rule]% first circle without the second
            \clip \secondcircle (-3,-3) rectangle (3,3);
        \fill[yellow] \firstcircle;
        \end{scope}
        \draw \firstcircle node {$A$};
        \draw \secondcircle node {$B$};
    \end{scope}

    % When using the above, you will notice that the border lines of the
    % original circles are erased by the intersection parts. To solve this
    % problem, either use a background layer (see the manual) or simply draw
    % the border lines after everything else has been drawn.

    % The last trick is to cheat and use transparency
    \begin{scope}[shift={(3cm,-5cm)}, fill opacity=0.5]
        \fill[red] \firstcircle;
        \fill[green] \secondcircle;
        \fill[blue] \thirdcircle;
        \draw \firstcircle node[below] {$A$};
        \draw \secondcircle node [above] {$B$};
        \draw \thirdcircle node [below] {$C$};
    \end{scope}


\end{tikzpicture}

% Naturally, all of this could be bundled into nicer macros, but the above
% should give the idea.

\end{document}