Setting up Group single sign-on
This documentation describes how Overleaf Group Professional subscribers can set up single sign-on (SSO) login access for members of their group. Please see Overleaf group single sign-on for an overview of the feature.
Plan for success
Before you set up Overleaf group SSO, make sure you can answer, "yes," to the following questions:
- Are you the administrator of an Overleaf Group Professional plan? If you're not the administrator, you'll need to work with the administrator to set up SSO. Only the administrator of the group can access the SSO configuration page.
- Do you have access to your organization’s Identity Provider (IdP)? To complete the SSO configuration, you'll need to set up Overleaf as an application in your IdP and obtain some configuration information from your IdP to complete the setup in Overleaf. If you don't have direct access to your IdP, you will need to work with someone who does (likely a member of your Information Technology (IT) services team).
- Do you have a high-level understanding of SAML-based SSO? While this documentation provides step-by-step instructions, it's not a tutorial on SAML-based SSO. For a better understanding of the concepts mentioned here, you may wish to consult additional tutorials and documentation.
Setting up Overleaf group SSO
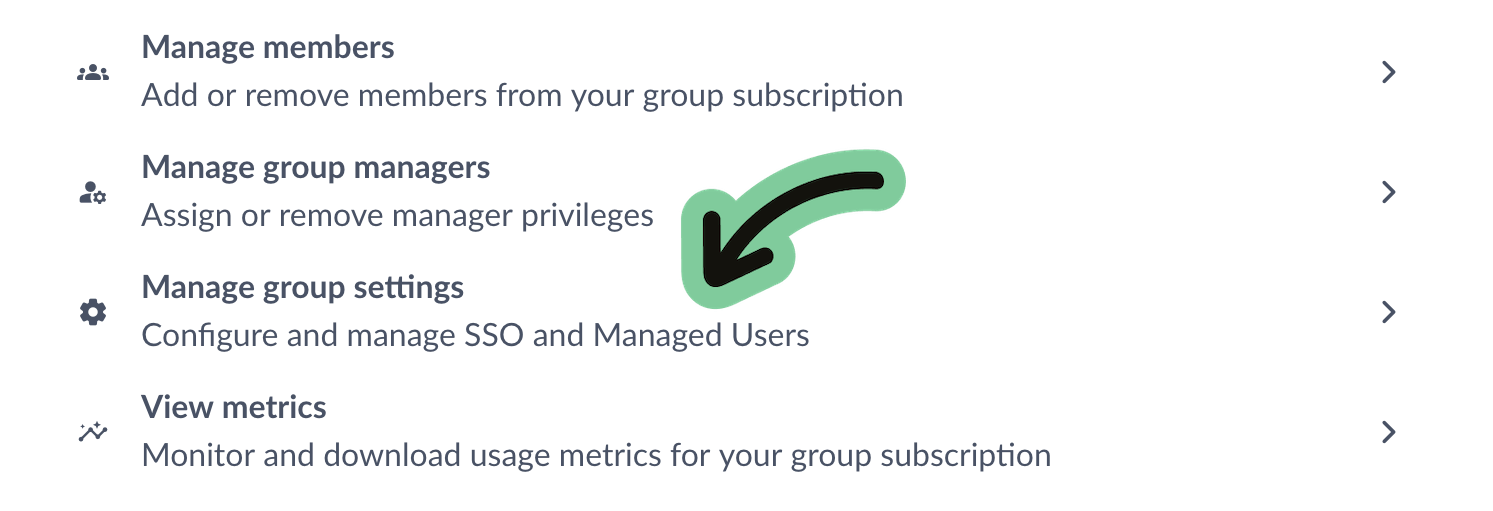
Overleaf Group Professional plan administrators have access to an SSO configuration page that guides them through the SSO setup process. The SSO configuration page can be accessed from your Subscription page under Manage group settings.
Overview of SSO setup
This section provides a high-level overview of the steps you will be following to set up SSO for your group. Detailed descriptions of each step are found in the next section. We recommend that you read through these high-level descriptions of the steps before moving on to the detailed instructions that follow.
Step 1. Add Overleaf to your Identity Provider
- Use Overleaf’s Group Professional SAML metadata to set up Overleaf as an application (Service Provider) in your IdP.
- You will need access to your Identity Provider for this step, or assistance from a member of your IT team who has permission to update your IdP.
- You may need to consult the documentation for your IdP for the steps required to add the Overleaf service as an application in your IdP.
Step 2. Configure your Overleaf subscription’s SSO settings with IdP metadata
- Provide information about your IdP to Overleaf through our easy-to-use SSO configuration page for plan administrators.
Step 3. Verify the connection between your IdP and Overleaf
- Test the connection between Overleaf and your IdP by logging in through our Test configuration interface.
- You will be able to fix any configuration issues identified through the testing process.
Step 4. Enable SSO for your team
- Enable SSO for your team on the Group settings page for plan administrators.
Once SSO is enabled, new and existing team members will be prompted to sign in using SSO to link their Overleaf accounts to their identity in your system. Once linked, SSO access is provided to users through Overleaf’s SSO login page—for further help see: Logging in with group single sign-on.
Detailed Group SSO setup instructions
Step 1. Add Overleaf to your Identity Provider
For your Identity Provider (IdP) to recognize Overleaf as a trusted service, you must set up Overleaf as a Service Provider (SP). This involves taking information from Overleaf’s SAML metadata and providing it as part of a service definition within your IdP.
In some IdPs, this process is referred to as adding an application or configuring a resource. Whether this is called adding or configuring a service provider, application, or resource, the process involves taking Overleaf’s metadata and providing it to your IdP by uploading it or pasting it into provided fields.
This requires you to log in to your IdP and update its configuration. If you do not have access to your IdP, you will likely have to work with a member of your IT Services team to complete this step.
If your IT team requires some information about security and privacy, please note that Overleaf, as part of Digital Science & Research Solutions Limited, is certified in compliance with ISO/IEC 27001:2013 (Information Security Management System). Please see our Security Overview and Privacy Notice, and if more information is needed, please contact us.
Add Overleaf’s metadata in your IdP
To complete this step, you'll need to provide information about Overleaf to your Identity provider. This usually involves creating an application in your system for Overleaf, and uploading or copying some of the data from Overleaf’s SAML metadata file.
Some IdPs allow you to complete a part of the service provider configuration by uploading an XML file that contains the SAML metadata, or by providing a URL to the metadata file. If those options are available, you can provide the XML file provided at this URL: https://www.overleaf.com/saml/group-sso/meta. You can also download the Overleaf Group Professional metadata from your Group subscription settings.

Note that the Overleaf metadata used to set up SSO for your team is not the same metadata that is published for higher-education consumers in UKAMF, Edugain, and other federations. Please be sure to use the metadata described here, and not metadata obtained from these federated sources.
Overleaf supports a Service Provider initiated SSO login process. Some IdPs allow you to configure an Identity Provider initiated login process. This isn't supported for logging in to Overleaf.
The following data from the Overleaf SAML metadata can also be directly added to the Overleaf service definition in your IdP.
| Name | Value | Notes |
| entityID | https://www.overleaf.com/saml/group-sso/meta
This value is found in the entityID attribute of the EntityDescriptor element in the Overleaf group SAML metadata file |
The entityID is a unique identifier for the Overleaf Group SSO service.
Some IdPs refer to this as the Audience URI, the Service Provider Issuer, the Audience Restriction, or the Relying Party Trust Identifier. |
| SAML signing certificate or X509 Certificate | This value is the X509Certificate element in the Overleaf group SAML metadata file. | Your (IdP) uses the Overleaf SAML signing certificate to verify the signature sent by Overleaf within its SAML authentication request.
This is sometimes referred to as the Signature Certificate, or Verification Certificate. |
| Assertion Consumer Service (ACS) endpoint | https://www.overleaf.com/saml/group-sso/callback
This value is the Location attribute of the AssertionConsumerService element in the Overleaf group SAML metadata file. |
This is the endpoint that your IdP will post SAML responses to.
This URL is also known as the Single sign-on URL, the destination, recipient, callback URL, reply URL, or SAML Assertion Endpoint. |
Other information about Overleaf that your IdP may request can include optional configuration of IDP-initiated logins and single log out. These are not currently supported.
Release claims to the Overleaf service
You will need to send some data to Overleaf when users are authenticated. In some cases your IdP may have existing attribute release policies or may offer the option to release all claims. Overleaf only requires a minimal set of data to be released.
unique identifier
Overleaf only requires one attribute: a unique, persistent, and non-reassignable identifier. We recommend a non-email unique identifier, as emails are not always persistent and often change when a user’s first or last name changes. A unique identifier (system id) that is formatted as an email is acceptable if it is unique, persistent, and non-reassignable.
This unique identifier is used by Overleaf to look up each user’s Overleaf account when they log in. In some cases, this is a UUID or System ID. End users will not see this Unique Identifier—it is used behind the scenes during the login process. When using Overleaf, users will identify their accounts using the primary email address that they register with Overleaf, but when logging in with SSO, it is actually the Unique Identifier that is used by the system to identify them.
The unique identifier can be released as the NameID or can be released under any attribute name.
Make a note of the attribute name for the unique identifier claim that is being released. You will need to provide this name to Overleaf in Step 2.
first and last name attributes
The optional first and last name attributes will be used by Overleaf to fill in the Account Settings of users who register for Overleaf accounts by signing in through SSO.
Make a note of the attribute names for the first and last name claims that are being released.
Authorize access to the Overleaf Service
You must authorize access to the Overleaf service for at least one user that will be used to test the SSO trust relationship and attribute release.
You can choose to authorize all your team members at this point, or this can be done later. Users who are authorized to access Overleaf through Group SSO must also be invited to the group subscription on the Overleaf side.
The test user does not need to be invited to the Overleaf group subscription. Any valid user account in your IdP can be used to test the SSO setup in Overleaf. No data will be saved for this test account, and no Overleaf account will be created for the test user during the testing phase.
Save the IdP SAML metadata
You will need to provide metadata from your IdP to Overleaf in Step 2. Some IdPs generate specific metadata for each Service Provider, while some use common endpoints and certificates for all Service Providers.
In many cases IdP SAML metadata is provided in the form of an XML file. Overleaf will require the single sign-on service HTTP Redirect location and the signing certificate used by your IdP for Overleaf in Step 2.
How did it go? Checklist for “Add Overleaf to your Identity Provider”
- Overleaf SAML metadata was used to add Overleaf as a service provider in the IdP.
- A unique identifier was released as a claim to Overleaf, and the attribute name for this has been recorded.
- The first and last name attributes were also released, and the attribute names have been recorded (optional).
- At least one test user has been authorized to access the Overleaf service.
- The IdP SAML metadata has been saved so this can be added to Overleaf. This may be an XML file, or it may be the Single Sign on HTTP-Redirect endpoint and the signing certificate used by the IdP.
Step 2. Complete the Group Settings SSO Configuration
With the information from your IdP gathered in Step 1, you will be able to configure the Overleaf side of the trust relationship and identify the attributes that your IdP will be sending Overleaf when your team members log in.
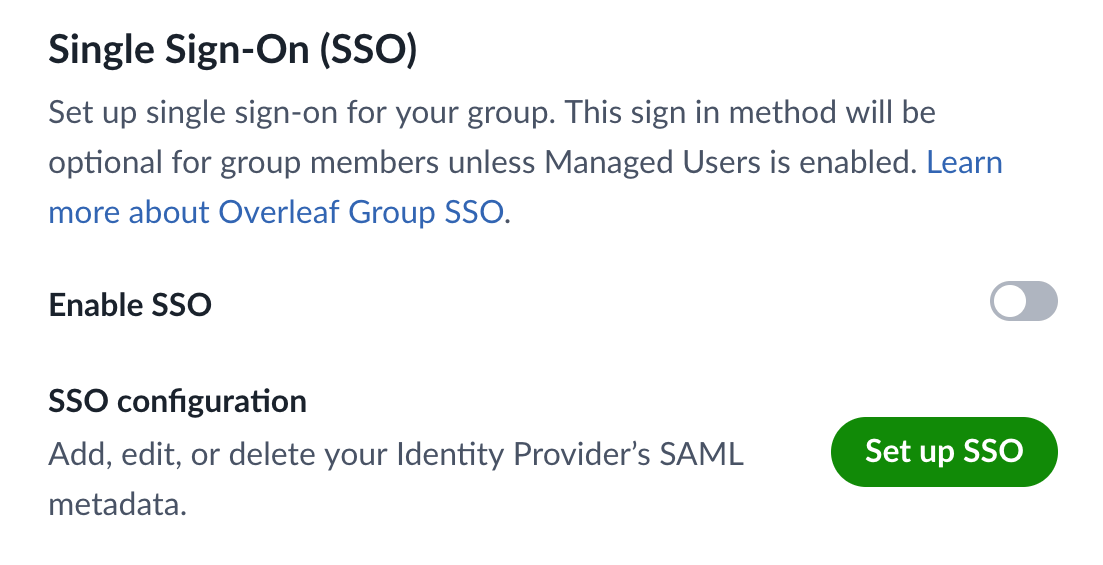
The group administrator can configure and enable SSO on an Overleaf Professional subscription.
The SSO configuration page is accessible from the group administrator’s subscription page in their Overleaf account: https://admin.overleaf.com/user/subscription.
The SSO configuration is saved while it is being tested. Once SSO is enabled, certificates can be added and removed while the rest of the configuration is locked. If any other part of the configuration other than certificates needs to be updated, it will be necessary to temporarily disable SSO. There are additional instructions for maintaining your Overleaf group SSO.
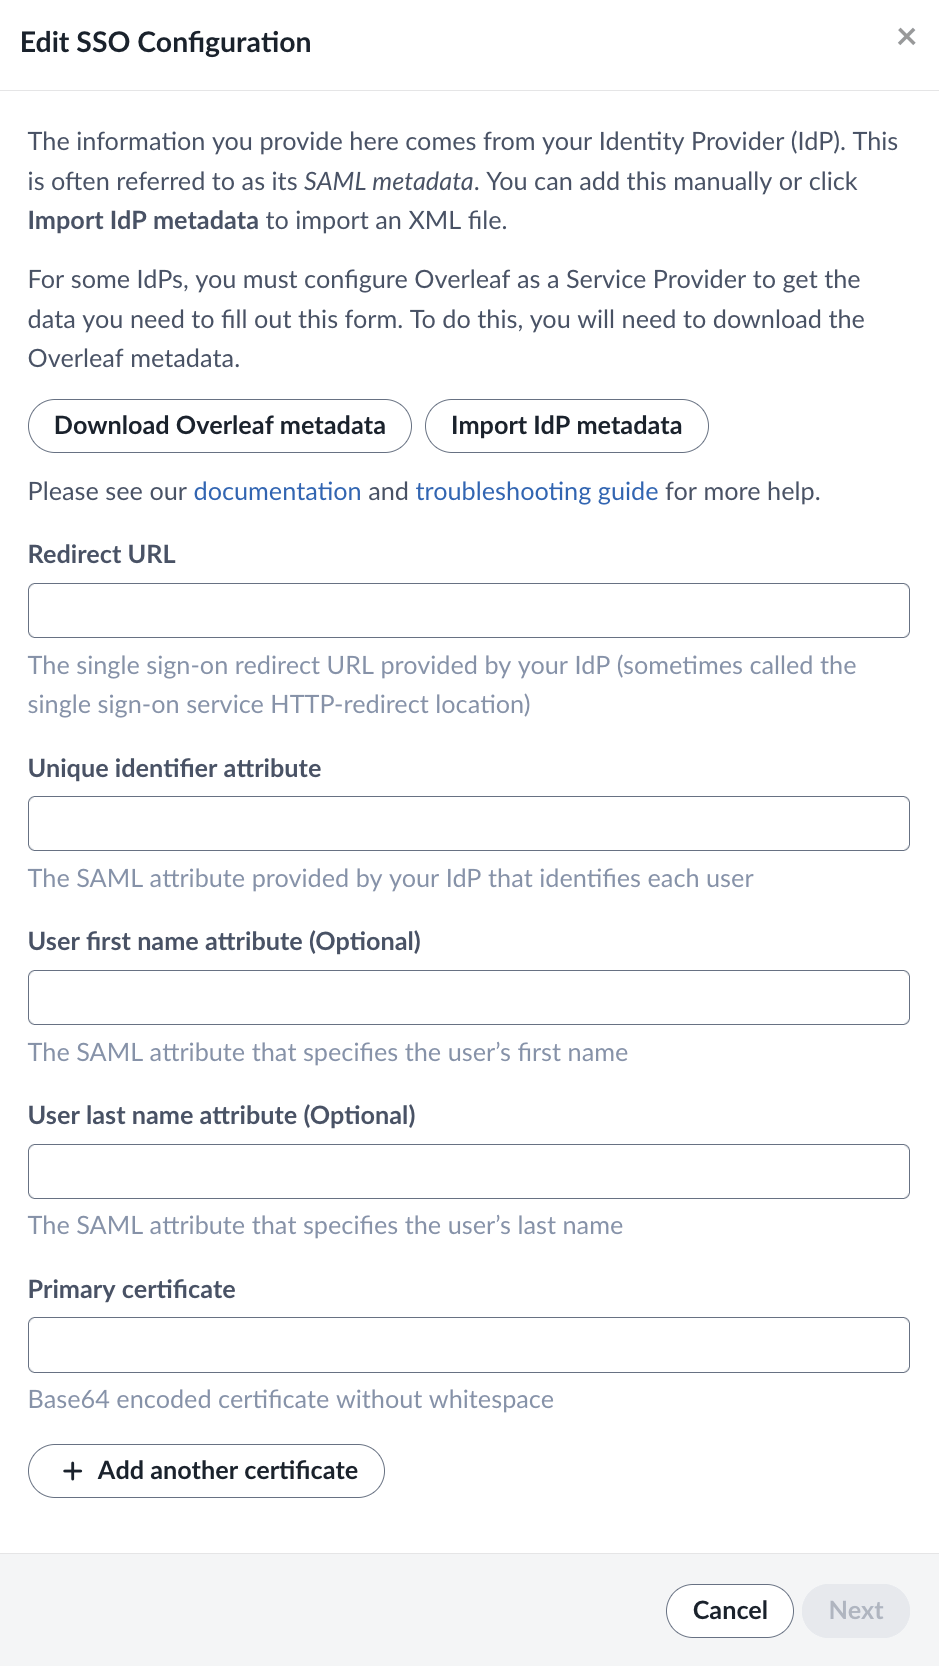
Please provide information from your IdP on the Edit SSO configuration page.
| Field | Description |
| Redirect URL | The Redirect URL is an endpoint provided by your IdP. This is sometimes called the Single Sign On Service HTTP-Redirect location. This might be a generic endpoint that is used for all services, or it may be one that is specifically generated by your IdP for Overleaf. This can usually be found in your IdP’s SAML metadata XML file. This URL is sometimes called the “SAML Endpoint” or “SSO URL”. |
| Unique Identifier | The Unique Identifier is an attribute or claim that you release to Overleaf which allows us to identify each user. The values sent for this attribute must be unique, persistent, and non-reassignable. You should be able to find the name of this attribute as a released claim in your IdP under the Overleaf service definition. |
| User first name attribute | The optional first name attribute will be used to initialize the Overleaf account for users who register through SSO. If the user has already provided this data to Overleaf, the attribute values sent will not be used. Users can update their first name in their Overleaf Account Settings. You should be able to find the name of this attribute as a released claim in your IdP under the Overleaf service definition. |
| User last name attribute | The optional last name attribute will be used to initialize the Overleaf account for users who register through SSO. If the user has already provided this data to Overleaf, the attribute values sent will not be used. Users can update their last name in their Overleaf Account Settings. You should be able to find the name of this attribute as a released claim in your IdP under the Overleaf service definition. |
| Primary certificate | You only need to provide the Primary Certificate.
In most cases, the certificate can be found as a “signing” X509Certificate element within the IdP metadata. This certificate can also be provided from a The option to provide additional certificates is to allow for a smooth changeover when an existing certificate expires. |
How did it go? Checklist for “Complete the Group Settings SSO configuration”
- The descriptions on this page for each part of the configuration have been reviewed.
- All the required fields have been entered on the Configure SSO page.
- The redirect URL is a valid Single Sign On Service HTTP-Redirect URL that can be accessed by the Overleaf service.
- The attributes names (unique identifier, user first name, user last name) match those for the claims being released by the IdP to the Overleaf service.
- The attribute identified as the Unique Identifier will have values that are unique, persistent, and non-reassignable.
Once you've provided all the configuration data on this page, the SSO configuration in your IdP and Overleaf is ready to be tested.
Step 3. Testing
Testing the trust relationship and configuration that has been set up between your IdP and Overleaf involves logging in through your IdP through the testing interface provided by Overleaf.
The user account for this test does not need to be invited to the Overleaf group subscription.
Any valid user account in your IdP can be used to test the SSO setup in Overleaf. No data will be saved for this test account, and no Overleaf account will be created for the test user during the testing phase.
To proceed with the test, click the button on the test screen to be redirected to your IdP to log in.
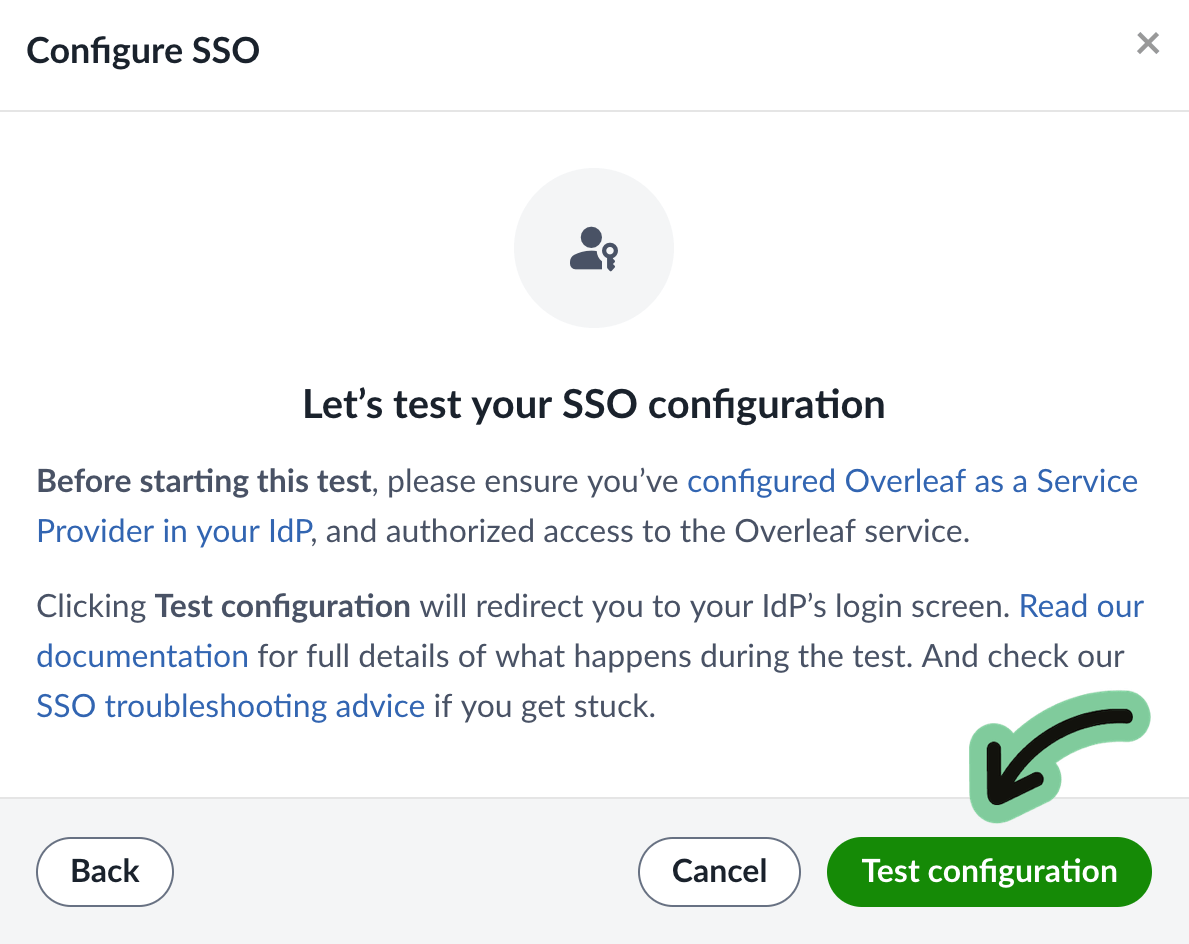
If after clicking on Test configuration you arrive at your IdP login screen, provide the username and credentials for your test user and log in as usual.
If you do not see your login page, but see some form of error, don't panic! Errors are not uncommon at this stage. Please see our test troubleshooting guide.
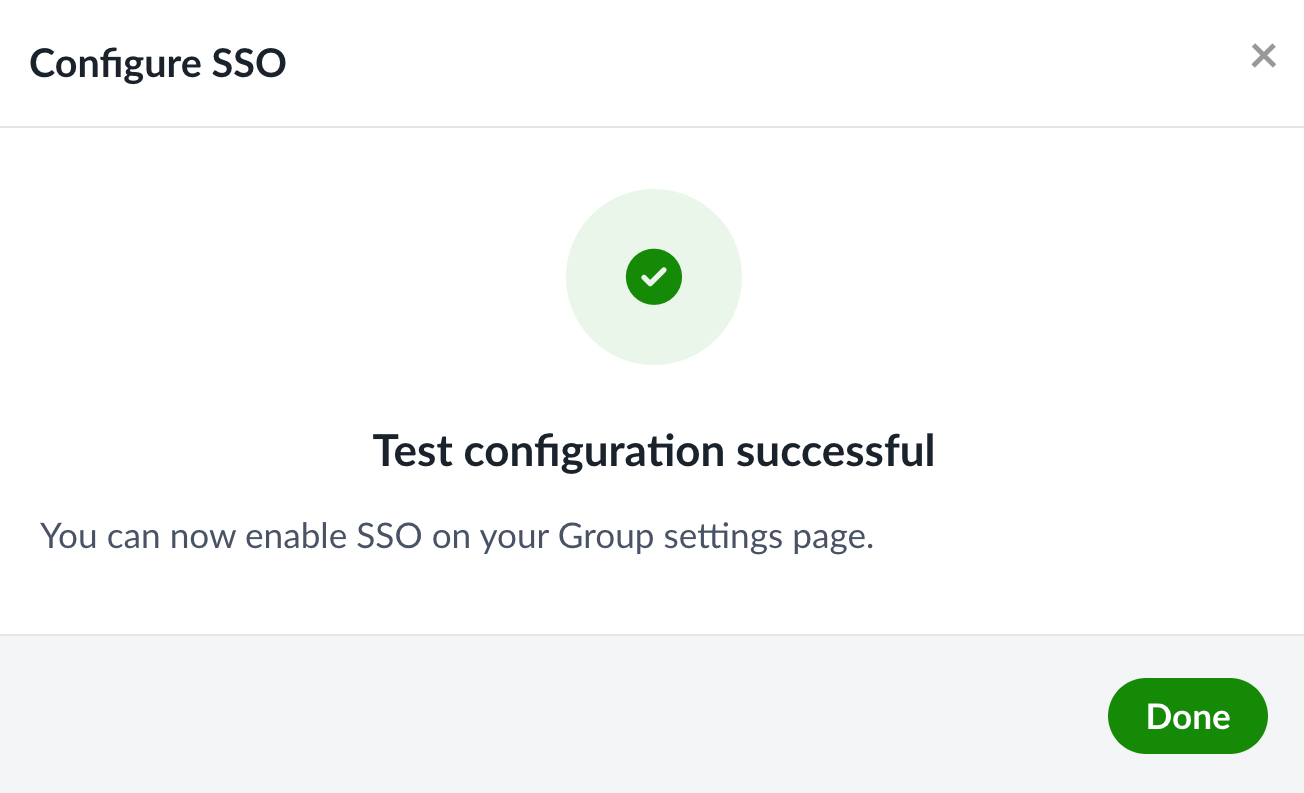
After logging in, you may see a screen that reports a successful test. If so, that’s great—you can now enable SSO for your team.
If you see an error or a warning from the Overleaf test validation page saying that something went wrong, please see our test troubleshooting guide.
How did it go? Checklist for “Testing”
- All errors and warnings identified by the Test configuration process have been addressed.
- A successful test has been reported.
If you're having trouble, please review the test troubleshooting guide. Fixing problems may require adjusting the configuration in your IdP and in Overleaf. If you are unable to complete the test, please get in touch.
Step 4. Enable SSO
When you have finished the configuration steps and have completed a successful test, you can return to your subscription’s settings page and enable SSO. You can also wait and enable SSO later.
Once SSO is enabled, your team members will receive emails that include a link for them to follow that will allow them to connect their Overleaf account to their SSO identity in your IdP. If they are already logged in to Overleaf, they will see a notification in their Overleaf dashboard letting them know that they can now connect and log in with SSO.
More information for your team members can be found on our login documentation page. If your team members are managed users, you may want to share our information for managed users.
How did it go? Checklist for “Enable SSO”
- SSO has been enabled.
- Documentation links have been shared with your team.
Maintaining your Group SSO
You may need to make changes to your SSO configuration in the future. This could include providing a new certificate, making updates to the attributes sent to Overleaf, or even changing the IdP you are using. Please see Managing Overleaf group SSO to learn how to maintain your Overleaf SSO configuration.
Related documentation
- Overleaf group single sign-on—an overview of Overleaf group SSO.
- Group SSO test troubleshooting—explains configuration issues you may have with your SSO setup.
- Linking users to group SSO—outlines steps required to get your subscription and your users ready to use single sign-on.
- Logging in with group single sign-on—instructions for group members to link their Overleaf accounts to their SSO identities and log in to their accounts. This documentation is intended for group members.
- Managing Overleaf group SSO—information for administrators on how they can maintain and make changes to their SSO configuration in Overleaf.
- User management in Overleaf—an overview of our Managed Users features.
- Managing a group subscription—an overview of adding and removing users and managers from an Overleaf group subscription.
Overleaf guides
- Creating a document in Overleaf
- Uploading a project
- Copying a project
- Creating a project from a template
- Using the Overleaf project menu
- Including images in Overleaf
- Exporting your work from Overleaf
- Working offline in Overleaf
- Using Track Changes in Overleaf
- Using bibliographies in Overleaf
- Sharing your work with others
- Using the History feature
- Debugging Compilation timeout errors
- How-to guides
- Guide to Overleaf’s premium features
LaTeX Basics
- Creating your first LaTeX document
- Choosing a LaTeX Compiler
- Paragraphs and new lines
- Bold, italics and underlining
- Lists
- Errors
Mathematics
- Mathematical expressions
- Subscripts and superscripts
- Brackets and Parentheses
- Matrices
- Fractions and Binomials
- Aligning equations
- Operators
- Spacing in math mode
- Integrals, sums and limits
- Display style in math mode
- List of Greek letters and math symbols
- Mathematical fonts
- Using the Symbol Palette in Overleaf
Figures and tables
- Inserting Images
- Tables
- Positioning Images and Tables
- Lists of Tables and Figures
- Drawing Diagrams Directly in LaTeX
- TikZ package
References and Citations
- Bibliography management with bibtex
- Bibliography management with natbib
- Bibliography management with biblatex
- Bibtex bibliography styles
- Natbib bibliography styles
- Natbib citation styles
- Biblatex bibliography styles
- Biblatex citation styles
Languages
- Multilingual typesetting on Overleaf using polyglossia and fontspec
- Multilingual typesetting on Overleaf using babel and fontspec
- International language support
- Quotations and quotation marks
- Arabic
- Chinese
- French
- German
- Greek
- Italian
- Japanese
- Korean
- Portuguese
- Russian
- Spanish
Document structure
- Sections and chapters
- Table of contents
- Cross referencing sections, equations and floats
- Indices
- Glossaries
- Nomenclatures
- Management in a large project
- Multi-file LaTeX projects
- Hyperlinks
Formatting
- Lengths in LaTeX
- Headers and footers
- Page numbering
- Paragraph formatting
- Line breaks and blank spaces
- Text alignment
- Page size and margins
- Single sided and double sided documents
- Multiple columns
- Counters
- Code listing
- Code Highlighting with minted
- Using colours in LaTeX
- Footnotes
- Margin notes
Fonts
Presentations
Commands
Field specific
- Theorems and proofs
- Chemistry formulae
- Feynman diagrams
- Molecular orbital diagrams
- Chess notation
- Knitting patterns
- CircuiTikz package
- Pgfplots package
- Typesetting exams in LaTeX
- Knitr
- Attribute Value Matrices
Class files
- Understanding packages and class files
- List of packages and class files
- Writing your own package
- Writing your own class