How to write a LaTeX class file and design your own CV (Part 1)
Author: James Allen (March 2011)
Everyone wants a professional looking CV and there are no shortage of LaTeX templates that will give you one. If you're like me though you'll want to own your CV and make it your own. That means you need to be able to customise the look and feel yourself which can be notoriously difficult in LaTeX. In this series of blog posts I hope to guide you through creating your own custom class file and show you that it can be easy to format your CV exactly how you want. We'll focus on a CV style but the methods will be identical for any sort of document.
What is a class file?
When you write \documentclass{article} in your LaTeX file, you are including the class file article.cls. This defines all the commands like \section and \title which go into structuring your document. It also configures how these commands affect the format and layout of the page.
Setting up your own class file
The neatest way to customise the format of a document is to keep all that information in a personal class file. This keeps the structure of your document cleanly separated from the formatting and allows for easy reuse. It's easy to set this up so create a document called cv.tex with the following content:
\documentclass{my_cv}
\begin{document}
\section{Education}
\subsection{University of Nowhere}
\section{Work}
\subsection{ABC Limited.}
\end{document}
This is trying to load your custom class file my_cv.cls, which doesn't exist yet. Create my_cv.cls in the same directory as cv.tex and write the following line in it:
\LoadClass{article}
If you compile your document now you should see the headers in the default article style.
So what has happened here? Class files need to contain a lot of formatting information and internal setup to make LaTeX work properly, but we don't want to have to enter it all manually. Instead we can base our new class file on article.cls. We use \LoadClass to include article.cls and load all of the commands and styles defined in it. Note that we don't use the usual \documentclass command to include article.cls because \documentclass should only ever be called once at the very beginning of your LaTeX document.
Telling LaTeX about your class
All class files should start with two lines similar to the following, which you should add in at the top of my_cv.cls now:
\NeedsTeXFormat{LaTeX2e}
\ProvidesClass{my_cv}[2011/03/26 My custom CV class]
The \NeedsTeXFormat commands tells the compiler which version of LaTeX the package is for. The current version of LaTeX is LaTeX2e and almost all distributions use this.
The \ProvidesClass command gives the compiler some information about your package. The first argument should match the filename of your class file and tells LaTeX what your package is called. The second argument is optional and provides a description of your class which will appear in the log and other places. The description must begin with a date in exactly the format above and it should be the date the package was last modified. This can be used when including the class to check that you have a recent enough version of it. For example if you include it via \documentclass{my_cv}[2012/01/01] with a date which is newer than the date in the class description then a warning will be shown saying that the class is outdated.
Modifying the section headers
The standard article section headings don't really suit a CV so we'd like to replace them with something neater. To do this, we can redefine the \section command to output a custom header.
Fortunately there is already an excellent package called titlesec which provides an easy way to customise our header styles. Include this in your class file with:
\RequirePackage{titlesec}
Notice that we should use \RequirePackage rather than the usual \usepackage command because we are in a class file. The \RequirePackage command makes sure that each package is only loaded once, even if called multiple times from different style and class files.
The titlesec package provides the command \titleformat which lets us customise our section headings. Add the following at the end of my_cv.cls to customise the format of the heading:
\titleformat{\section}         % Customise the \section command
  {\Large\scshape\raggedright} % Make the \section headers large (\Large),
                               % small capitals (\scshape) and left aligned (\raggedright)
  {}{0em}                      % Can be used to give a prefix to all sections, like 'Section ...'
  {}                           % Can be used to insert code before the heading
  [\titlerule]                 % Inserts a horizontal line after the heading
If we compile cv.tex now we will see that we have some main headers more appropriate for a CV:

We can customise the \subsection headers as well:
\titleformat{\subsection}
  {\large\scshape\raggedright}
  {}{0em}
  {}
The sub-sections are now in the same style:

You should try out some of the formatting options available to see what you like:
\bfseries,\itshape: make the heading bold or italic;\scshape:small capitals;\small,\normalsize,\large,\Large,\LARGE,\huge,\Huge: set the font size;\rmfamily,\sffamily,\ttfamily: set the font type to serifed, sans serifed or typewriter respectively.
Adding dates to section headers
We can define some new commands which let us include dates in our section headings. Include the following in your class file:
\newcommand{\datedsection}[2]{%
  \section[#1]{#1 \hfill #2}%
}
\newcommand{\datedsubsection}[2]{%
  \subsection[#1]{#1 \hfill #2}%
}
This defines two new commands \datedsection and \datedsubsection which take two arguments: the section name as before, and a date which will be typeset on the right-hand side of the page. The \hfill command tells LaTeX to fill as much space as possible and so pushes the second argument (#2) to the right of the page. Modify cv.tex to use these commands:
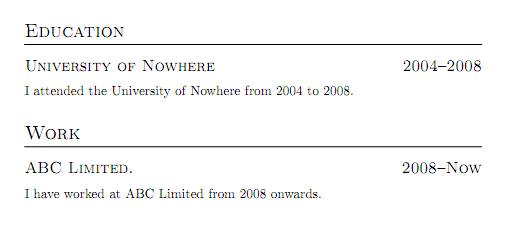
\documentclass{my_cv}
\begin{document}
\section{Education}
\datedsubsection{University of Nowhere}{2004--2008}
I attended the University of Nowhere from 2004 to 2008.
\section{Work}
\datedsubsection{ABC Limited.}{2008--Now}
I have worked at ABC Limited from 2008 onwards.
\end{document}
Our CV now contains dates:
Conclusions
That's all for part one of this guide, but hopefully I've covered enough for you to go away and start making useful class files. It hasn't taken many commands to create what already looks like a reasonable CV template and we've only scratched the surface of what else we could customise. In the next few parts of this guide I will talk about passing options to your class to configure it, creating a nice title and how to set some general layout options.
Thanks for reading!
Note that I am relatively new to creating class files myself, so if anyone can point out better ways to do the things I have mentioned here, please let me know.